May 2013
Software Full Version Download and Tech News Update

Logger ေတြဟာ ကိုယ့္ရဲ႕ အေရးအႀကီးဆံုး၊ လံုၿခံဳေရးအခ်က္အလက္ေတြကို ခိုးယူတဲ့ Software ျဖစ္ပါတယ္.. Hacker ေတြဟာ ကိုယ့္ဆီက Bank Account နံပါတ္ေတြ၊ Password ေတြကို ခုိးယူဖို႔အတြက္ Malware ေတြ၊ Trojan ေတြပို႔လႊတ္ၿပီး တိုက္ခိုက္ေလ့ရွိပါတယ္.. သူတို႔ရဲ႕ လုပ္ေဆာင္ခ်က္ေတြဟာ ညင္သာလြန္းတာေၾကာင့္ ေတာ္ရံုလူ မသိႏိုင္ပါဘူး.. Zemana AntiLogger ကေတာ့ အဲဒီ Logger ေတြရဲ႕ ရန္က အျပည့္အဝ ကာကြယ္ေပးမွာျဖစ္ပါတယ္.. Logger အမ်ဳိအစားေတြ ျဖစ္တဲ့ SSL Logger, Webcam Logger, Key Logger, Screen Logger, ClipBoard Logger ေတြအားလံုးကို ေထာက္လွမ္းသိရွိႏိုင္ၿပီး အခ်ိန္မီ တားဆီးကာကြယ္ေပးမွာျဖစ္ပါတယ္..
Anti-Logger, developed to deal with different kinds of malware threats, protects your banking passwords, private emails & chat conversations from spying proactively without needing a signature-based algorithm and includes powerful, anti-action methods.AntiLogger prevents all known forms of malwares which intend to carry out information theft. As AntiLogger uses a proactive and a unique way to detect potentially harmful applications which have not already been recognized or identified by any anti-virus programs consequently, it protects your 'Information Security' from a range of threats.Modules: Anti-SSL Logger, Anti-WebCam Logger and Anti-ClipBoard Logger are the first security solutions developed in the world. Also, you will realize that these modules have the best features if compared to similar applications.Anti-KeyLogger Module provides a new powerful protection against keyloggers which have not been even caught by known, the most popular security softwares in the world.

အဆင္ေျပပါေစ..

ေမာင္ေပါက္

Setup Download :

Keygen Download :

Advertise Here !

Software Full Version Download and Tech News Update

Stellar Phoenix က Recovery Software ေလာကမွာ ကမၻာ့နံပါတ္(၁)စြဲေနတဲ့ ကုမၸဏီပါ.. အခု Excel ေတြခ်ည္း Recover လုပ္ေပးမယ့္ Stellar Phoenix Excel Recovery 4.1 ကို ထုတ္လုပ္ထားျပန္ပါၿပီ.. Excel ဖိုင္ေတြေတာ္ေတာ္မ်ားမ်ား ဟာ အဖိုးတန္ ကိန္းဂဏန္းေတြနဲ႔ အလုပ္လုပ္တဲ့ Program တစ္ခုပါ.. ေထာင္ေပါင္းမ်ားစြာေသာ ေငြေၾကးစာရင္းဇယားေတြ၊ သခ်ာၤကိန္းဂဏန္းေတြ၊ တြက္ခ်က္မႈ ကိန္းဂဏန္းေတြ ေတာ္ေတာ္မ်ားမ်ားကို Excel နဲ႔ ေရးသားေလ့ရွိၾကပါတယ္.. ဒီလို ႀကိဳးစားပမ္းစားနဲ႔ တန္ဖိုးရွိတဲ့ Excel ဖိုင္ေတြကို မွားဖ်က္မိတာ၊ Format ခ်မိတာ၊ Virus ေတြလက္ခ်က္နဲ႔ပ်က္သြားတာတို႔ကို ပကတိ အေကာင္းအတိုင္း ျပန္လည္ရယူေပးမွာျဖစ္ပါတယ္.. ေနာက္ဆံုးထြက္ Excel 2013 ကလြဲရင္ က်န္တဲ့ 2000, 2003, 2007, 2010 ေတြကထုတ္တဲ့ ဖိုင္အမ်ဳိးအစားအားလံုးကို ရယူေပးႏိုင္ပါတယ္.. Windows 7, Vista, Server 2003, XP, 2000 and NT ေတြမွာ Compatible ျဖစ္ပါတယ္..

အဆင္ေျပပါေစ..

ေမာင္ေပါက္

Setup Download :  3.35 MB

Crack Download: 

Advertise Here !

Software Full Version Download and Tech News Update
ကိုယ္ရဲ႕ ကြန္ပ်ဴတာမွာ သူမ်ားက USB Stick ေတြ လာလာထိုးတာ မႀကိဳက္သူမ်ားအတြက္ Removable Access Tool နဲ႔ Lock ခ်ထားလို႔ရပါတယ္.. လုပ္ရတာလည္းလြယ္ပါတယ္..
1. USB ကို လံုးဝ ထိုးမရေအာင္ လုပ္ထားမလား..


2. ခ်ိတ္ခြင့္ေတာ့ေပးတယ္.. ဒါေပမယ့္ ကိုယ့္ကြန္ပ်ဴတာထဲက USB Drive ထဲကို Data ကူးယူသြားခြင့္ မေပးခ်င္ဘူးလား.

3. ခြင့္ျပဳထားခ်င္ရင္လည္း ရပါတယ္..


4. Autorun ကိုလည္း ပိတ္ထားႏိုင္တယ္..

5. ကိုယ့္ထဲကို ခ်ိတ္လာတဲ့ USB Drive ထဲမွာ ဖိုင္ေတြ ဝွက္ထားလို႔မရေအာင္ လုပ္မယ္ေလ.


6. Setting ကို ဝင္လို႔မရေအာင္ ကာကြယ္ထားႏိုင္တယ္..


7. ဒီေကာင္ကို စီမံဖို႔အတြက္ Password နဲပိတ္ၿပီးကာကြယ္ေပးထားလို႔လည္း ရေသးတယ္..


အဆင္ေျပပါေစ..

ေမာင္ေပါက္


Download :

Advertise Here !

Software Full Version Download and Tech News Update

မိမိတို႔ရဲ႕ USB ကို password နဲ႔ လံုလံုပိတ္ထားခ်င္တယ္ဆိုရင္ေတာ့ GiliSoft USB Stick Encryption ကိုသံုးႏိုင္ပါတယ္..

Features and Benefits:
GiliSoft USB Stick Encryption is a powerful tool that password protects all your external portable media. No matter what type of external storage device you use, USB stick encryption password protects it within seconds.

GiliSoft USB Stick Encryption works on all flavors of Windows. USB stick encryption works perfectly well on all external portable media like USB flash drives, Thumb Drives, Memory Sticks, Memory Cards, Pen Drives and Jump Drives.
Whatever information, files, folders and documents you put in your USB drive, USB stick encryption keeps them completely secured.
Gili USB Stick Encryption protects data using several layers of patent pending protection methods. This makes its protection, PC and hardware independent.
Total peace of mind from security leaks and privacy breaches. Never again fear of what's happening to your device while it is lost.
GiliSoft USB Stick Encryption is easy to install, run and use. It doesn't complicate it's users with technical jargon common in other encryption programs.
A very easy to use program with user-friendly interface.

အဆင္ေျပပါေစ..

ေမာင္ေပါက္

Download : 2.18 MB

  • Dev-Host

  • Solidfiles

  • Tusfiles ((Download with TusFiles accelerator and get recommended offers. ေဘးက အမွန္ျခစ္ကို ျဖဳတ္ၿပီးမွ ေဒါင္းပါ)
  • Zippyshare


Advertise Here !

Software Full Version Download and Tech News Update

ဒီပိုစ့္ အတြက္ နည္းနည္းေျပာခ်င္ပါတယ္ ခင္ဗ်ာ..
က်ေနာ္ သိလို႔တက္လို႔ တင္တာမဟုတ္ပါဘူး ခင္ဗ်ာ..ျပန္လည္မွ်ေဝျခင္းသက္သက္ပါေနာ္
က်ေနာ္ ေနတာက မေလးရွားပါ ဖုန္းေတြ ကလိႏိူင္ဖို႔ အတြက္ အလြန္ကို ခဲယဥ္းပါတယ္
က်ေနာ္ နဲနဲေလာက္ပဲ သိပါတယ္ မကြ်မ္းက်င္ပါဘူးကြယ္ ..အဟီး
အဲဒါေၾကာင့္ သိတဲ့တက္တဲ့ က်ေနာ္ ညီငယ္ ေတြ အကိုေတြ ဆီကေန ျပန္ တင္လိုက္တာပါ
မိမိဖုန္း အခက္အခဲရွိလို႔ ေမးခ်င္တယ္ဆိုရင္ ရွယ္လာတဲ့ ပိုစ့္ေတြမွာ မူရင္းလင့္ ကိုခ်ိပ္ထားေပးပါတယ္
တိုက္ရိုက္သြားၿပီးေတာ့ ေဆြးေႏြးရင္ သူငယ္ခ်င္းတို႔ အတြက္ အခ်ိန္ကုန္ သက္သာမယ္ထင္ပါတယ္ ေနာ္
က်ေနာ္ ဒီလို ျပန္ရွယ္ရတာလဲ ေနာင္တခ်ိန္ လိုအပ္ရင္ အလြယ္တကူရႏိူင္ေအာင္လို႔ပါ ။
ေက်းဇူးတင္ပါတယ္ ..ဟီးဟီး
အရင္ဆုံးဒီဖုိင္ေလးကုိေဒါင္းလုိက္ပါ။
Y210 Series One Click Root Fonts(Setup).rar     
Download=> Link 1 / Link 2

ကဲျပီးသြားရင္ေတာ့ rar ကုိျဖည္လုိက္ပါ။
Set up.exe ေလးေတြေတြ႕ပါလိမ့္မယ္..
Install ဆြဲလုိက္ပါ။
Screenshot - 5_27_2013 , 6_47_40 PM
Install ဆြဲေနရင္း Serial Key ေတာင္းရင္ mmsd ထည့္ေပးလုိက္ပါ။
Screenshot - 5_27_2013 , 6_47_49 PM

Install ဆြဲျပီးသြားရင္ေတာ့ Desktop ေပၚမွာ Shockcut ေတြ႔ပါလိမ့္မယ္…
ဖုန္းကုိ Unknown Sources On နဲ႕ USB Debugging ON ထားပါ။
ျပီးသြားရင္ေတာ့ ပါ၀ါပိတ္လုိက္ပါ။
Volume up + Power နဲ႕ Fastboot Mode ၀င္ျပီး ၾကိဳးထုိးလုိက္ပါ။
ျပီးသြားရင္ေတာ့ Software ကုိ ဖြင့္လုိက္ပါ။
Screenshot - 5_27_2013 , 5_58_29 PM

မိမိလုပ္မဲ့ဖုန္းကုိ နံပါတ္ေရြးျပီးလုပ္လုိက္ပါ။
အားလုံးျပီးသြားရင္ Root Access,Myanmar Fonts,Frzoenkeyboard အကုန္ရပါျပီ။
အဆင္ေျပပါေစ။


Advertise Here !

Software Full Version Download and Tech News Update

လိေမၼာ္ေရာင္ကိုႀကိဳက္တဲ့ Blogger ေတြအတြက္ OrangeLine Template ျဖစ္ပါတယ္.. 3-Colums ျဖစ္ၿပီး Drop-Down Menu ေတာ့ မပါဝင္ပါဘူး..

အဆင္ေျပပါေစ..

ေမာင္ေပါက္

Advertise Here !

Software Full Version Download and Tech News Update


အနက္ေရာင္ Themes ကိုႀကိဳက္တဲ့ Blogger မ်ားအတြက္ Btemplate ရဲ႕ Virtuale အမည္ရွိ Template ျဖစ္ပါတယ္.. 2-Colum ျဖစ္ၿပီး Drop-Down Menu ပါဝင္ပါတယ္.. Future Slide ပါဝင္လာတဲ့အတြက္ ေခတ္ဆန္တယ္လို႔ဆိုရမွာျဖစ္ပါတယ္..

အဆင္ေျပပါေစ..

ေမာင္ေပါက္

Advertise Here !

Software Full Version Download and Tech News Update


Btemplate ကထုတ္တဲ့ 2- Colum Blogger Template ျဖစ္ပါတယ္.. Sidebar ေတြက ဘယ္ဘက္မွာျဖစ္တဲ့အတြက္ ရွင္းလင္းေသသပ္ပါတယ္.. Drop Down Menu ေတာ့ မပါဝင္ပါဘူး..

အဆင္ေျပပါေစ..

ေမာင္ေပါက္

Advertise Here !

Software Full Version Download and Tech News Update

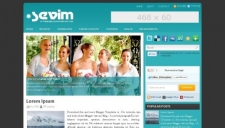
btemplates ကထုတ္တဲ့ Sevim Template ျဖစ္ပါတယ္.. Blogger အတြက္ျဖစ္ၿပီး 2-Colum အမ်ဳိးအစားျဖစ္ပါတယ္.. Drop Down Menu ေတြပါဝင္ပါတယ္.. Blogger မ်ားအတြက္ အလြယ္တကူရေအာင္ တင္ေပးလိုက္တာပါ

အဆင္ေျပပါေစ..

ေမာင္ေပါက္


Advertise Here !

Software Full Version Download and Tech News Update
စပ္စု: " Samsung GT-N5100 " Android ဖုန္းကို Root လုပ္ျပီး ျမန္မာ Font သြင္းခ်င္လို ့ပါ။ " ကူညီေပးပါအံုး ေက်းဇူး ကိုေမာင္ေပါက္ေရ က်ေနာ္ ဘယ္မွာမွ ရွာမရလို ့ပါေနာ္...
***********
ပထမဆံုး ေအာက္ကလင့္တစ္ခုခုမွာ Samsung_Galaxy_Note_80_ToolKit_v1.1 ဖိုင္ကို အရင္ ေဒါင္းလိုက္ပါ.. ေဒါင္းၿပီးရင္ rar ကို ျဖည္ၿပီး Install လုပ္လုိက္ပါ...
Dev-Host    Solidfiles    Zippyshare
1. မိမိဖုန္းကို USB ႀကိဳးသံုးၿပီး Computer နဲ႔ ခ်ိတ္လိုက္ပါ.. USB Debugging, Unknow source ေတြကိုအမွန္ျခစ္ေပးထားပါ.. ( ToolKit က Driver ပါ သြင္းေပးပါတယ္.. )


2. ခုနက Install လုပ္ခဲ့တဲ့ Toolkit ကို Run လိုက္ပါ..
ဒါဆိုရင္ အမဲေရာင္ကြက္ေပၚမွာ အစိမ္းေရာင္ စာသားေလးေတြ တက္လာမွာျဖစ္ၿပီး ToolKit ဗားရွင္းကို ျမွင့္မွာလား ေမးပါတယ္.. လက္ရွိ ေနာက္ဆံုးထြက္ ဗားရွင္းကို လိုခ်င္ေသးတယ္ဆိုရင္ yes လို႔ရိုက္ထည့္ၿပီး Enter ေခါက္လိုက္ပါ.. ဒီ ဗားရွင္းနဲ႔ပဲ လုပ္မယ္ဆိုရင္ေတာ့ no လို႔ ႐ိုက္ထည့္ၿပီး Enter ေခါက္လိုက္ပါ..
3. ဒီတစ္ခါ မိမိဖုန္းအမ်ဳိးအစားအလိုက္႐ိုက္ထည့္ရမယ့္ ဂဏန္းေတြကေတာ့
GT-5100 ဆိုရင္ 11
GT-5110 ဆိုရင္ 21 ျဖစ္ပါတယ္..
GT-5120 အတြက္ေတာ့ ႏွိပ္စရာဂဏန္း မေတြ႕ပါဘူး..
ကိုယ့္အမ်ဳိးအစားနဲ႔ကိုက္တာကိုၾကည့္ၿပီး ကီးဘုတ္ေပၚက 11 (သို႔မဟုတ္) 21 ကိုရိုက္ထည့္ၿပီး Enter ေခါက္လိုက္ပါ..

ဒါဆိုရင္ လိုအပ္တဲ့ ဖိုင္ေတြကို ေဒါင္းေနတာ ေတြ႕ရပါလိမ့္မယ္...
 
4. Download လုပ္တာၿပီးသြားရင္ Root လုပ္တဲ့လုပ္ငန္းစဖို႔ အဆင္သင့္ျဖစ္ေနပါၿပီ...
Root လုပ္ဖို႔အတြက္ ကီးဘုတ္ေပၚက 2 ကိုႏွိပ္ၿပီး Enter ေခါက္ပါ..
ၿပီးရင္ ကီးဘုတ္က 2 ကိုထပ္ႏွိပ္ၿပီး Enter ေခါက္ပါ..
ဒါဆိုရင္ Superuser ႏွစ္ခု ကိုေရြးရမွာျဖစ္ပါတယ္.. 1 က superuser 3.1.3 ျဖစ္ၿပီး 2 က SuperSU 1.25 ျဖစ္ပါတယ္.. ႀကိဳက္တာေရြးလို႔ရတဲ့သေဘာပါ.. ကၽြန္ေတာ္ကေတာ့ SuperSU ကိုေရြးခ်ယ္ခ်င္တဲ့အတြက္ ကီးဘုတ္က 2 ကို႐ိုက္ထည့္ၿပီး Enter ေခါက္လိုက္ပါတယ္.. ( ဒီအဆင့္ထိ 2 ကို 3ခါ ေခါက္ရတာကို သတိထားမိပါလိမ့္မယ္.. )


5. ဒီဆင့္ကေတာ့ ေရြးခ်ယ္မႈေတြအားလံုးၿပီးသြားတဲ့အတြက္ ဆက္လုပ္မွာလား မလုပ္ဘူးလား Confirm ေတာင္းတဲ့အဆင့္ပါ.. no ကို႐ိုက္ထည့္ၿပီး Enter ေခါက္ရင္ Main Menu ကို ျပန္ေရာက္သြားမွာျဖစ္ပါတယ္.. ဆက္လုပ္မွာျဖစ္တဲ့အတြက္ ကီးဘုတ္ကေန yes လို႔႐ိုက္ထည့္ၿပီး Enter ေခါက္လိုက္ပါ...
စၿပီး root ေနပါၿပီ...
Odin တက္လာၿပီဆိုရင္  Myy computer\C \Samsung_Galaxy_Note80_ToolKit\ root ထိ အဆင့္ဆင့္သြားၿပီး ကိုယ္က GT-N5100 ကို Root ေနတာဆိုရင္ GT-N5100> boot-insecure-bmd1-GTN5100.tar ကိုေရြးေပးရမွာပါ.. GT-N5100 ဆိုတဲ့ ဖိုဒါရဲ႕ေအာက္မွာ boot-insecure-bmd1-GTN5100.tar နဲ႔ boot-stock-bmd1-GTN5100 ဆိုၿပီးရွိပါတယ္.. boot-stock-bmd1-GTN5100 ကို မေရြးရပါဘူး.. ဒီလိုပဲ GT-N5110 ကို Root ေနတာဆိုရင္ GT-N5110 ဖိုဒါထဲက boot-insecure-bmd1-GTN5110.tar ကိုေရြးေပးရမွာပါ...  ၿပီးရင္ odin ရဲ႕ Start ႏွိပ္ေပးလိုက္ပါ.. ဖုန္းက reboot ျဖစ္သြားၿပီး ျပန္တက္လာပါမယ္.... ခဏေနရင္ Odin မွာ Pass စာတန္းေပၚလာမွာ ျဖစ္ပါတယ္.. ဆက္ေစာင့္ပါ.. ႀကိဳးကို ျဖဳတ္ဖို႔ မႀကိဳးစားပါနဲ႔ အံုး.. Toolkit က ဆက္ၿပီး အလုပ္လုပ္ေနပါလိမ့္မယ္.. အားလံုးၿပီးသြားရင္ေတာ့ ဖုန္းရဲ႕ App List ထဲမွာ Superuser ေလးျမင္ရမွာျဖစ္ပါတယ္.. ဒါဆို Root လို႔ ေအာင္ျမင္ပါၿပီ...

အဆင္ေျပပါေစ..

ေမာင္ေပါက္

Source : Xada-developer

Advertise Here !

Software Full Version Download and Tech News Update

CD Recovery Toolbox 2.0 ဟာ ပ်က္စီးေနတဲ့ CD,DVD,HD DVD, Blur Ray စတဲ့ Disc ေတြထဲက Data ေတြကို ရယူေပးႏိုင္တယ္လို႔ဆိုပါတယ္.. ပ်က္စီးေနတယ္ဆိုေတာ့ ကြန္ပ်ဴတာက လံုးဝဖတ္မရတာမ်ဳိးကိုေတာ့ ရယူေပးႏိုင္မွာ မဟုတ္ပါဘူး.. ကြန္ပ်ဴတာက ဖတ္ေပးမယ့္ Data ေတြကို Copy ကူးၿပီး Backup လုပ္တဲ့အခါ Error တက္တာမ်ဳိးကို ဒီေကာင္က အေကာင္းဆံုး ဆယ္ယူေပးထားမွာပါ.. Free Version ျဖစ္ေပမယ့္ အစြမ္းက မေသးပါဘူး..
D Recovery Toolbox Free was developed for recovering damaged files CD, DVD, HD DVD, Blu-Ray and etc disks. You can use it to restore information lost as a result of some mechanical damage of the disk (scratches, chips, different spots on the surface) or as a result of incorrect recording. Program can recover data that was considered lost. Tool scans any CD and DVD disks and finds files and folders located there. We should mention that there can be some information on the disk that cannot be recovered. Not all of the files and folders can be found - that depends on the degree and location of the damage. Therefore, tool finds the possible maximum amount of information. After that, it shows a list of all files and folders available for recovery. Now the user can select the files and folders to be recovered. Those specific objects will be recovered while the others will be ignored.
The program recovers the maximum amount of information in the damaged file. This reduces the risk of data loss considerably. Program features: - Recovering information from any CD and DVD disks - Recovering files larger than 4 Gb - Detecting possible lack of free space on the hard disk for storing the recovered files Tool not only has a complete set of data recovery features, but is also user-friendly and convenient. The program interface is designed as a step-by step wizard, where the user has to perform a single action on each page of the wizard. The wizard makes the use of the tool very simple and convenient even for a beginner. As for the fact that practically every PC user needs a tool for recovering information from CD and DVD disks, there is no doubt about it. As you know, these storage media are the most widely spread nowadays. They are rather capacious, all-purpose, durable and, what's important, inexpensive. The problem is - they aren't very reliable.

အဆင္ေျပပါေစ..

ေမာင္ေပါက္


Download : 2.17 MB

Advertise Here !

Software Full Version Download and Tech News Update
 
Ashin Indapala: တကာေတာ္ ကိုေမာင္ေပါက္ေရ... ငါ့ ဘေလာ့မွာ Comment ေရးလိုက္ရင္ အဲဒီComment ေတြ ဘယ္ေပ်ာက္သြားလဲ မသိဘူး၊ Comment အေရအတြက္ေတာ့ ေပၚတယ္၊ ဘယ္လိုလုပ္ရမလဲ ေက်းဇူးျပဳၿပီး လမ္းညႊန္ေပးပါဦး... ေက်ဇူးတင္ပါတယ္။

အရွင္ဘုရားရဲ႕ ဘေလာ့က Comment က ေပ်ာက္သြားစရာ အေၾကာင္း (၂)ခ်က္ရွိပါတယ္ဘုရား... ပထမတစ္ခ်က္က Spam ထဲကိုေရာက္ေနတာ.. ဒါမွ မဟုတ္.. Moderation ထဲကို ေရာက္ေနတာ.. ႏွစ္ခုစလံုးလည္း ျဖစ္ႏိုင္ပါတယ္ဘုရား.. ဒီလိုလုပ္ၾကည့္လိုက္ပါဘုရား..
1. Blogger ထဲကို Sign in ဝင္လိုက္ပါ..
2. ဘယ္ဘက္ျခမ္းမွာ New Post , Overview, Post, Page စတဲ့ ေခါင္းစဥ္ေတြထဲက Comment ဆိုတာကို ႏွိပ္လိုက္ပါ..
3. Comment မွာ Published ဆိုတာက ေရးထားၿပီးသား Comment ေတြထဲက ပို႔စ္မွာ ေဖၚျပထားတဲ့ Comment ေတြပါ.. အဲဒီေအာက္မွာ Waiting for moderation ဆိုတာရွိပါတယ္ဘုရား.. Comment ေတြကို ဘေလာ့တည္ေထာင္သူခြင့္ျပဳမွ ပို႔စ္မွာ ေဖၚျပမွာလို႔ Setting မွာ ခ်ိန္ထားခဲ့တဲအတြက္ ဘေလာ့ Admin ရဲ႕ Publish လုပ္ဖို႔ ေစာင့္ေနၾကတာပါ.. အဲဒီ Waiting for moderation ထဲက Comment ေတြထဲက ကိုယ္ ေဖၚျပေစခ်င္တဲ့ Comment ရဲ႕ေဘးမွာ အမွန္ျခစ္လိုက္ၿပီး Pubsish ကိုႏွိပ္ရပါမယ္ဘုရား...


4. အဲဒါၿပီးရင္ Spam ကိုႏွိပ္ပါ.. Spam ထဲမွာလည္း Comment ေတြ ရွိေနႏိုင္ပါတယ္.. အဲဒီ Comment ေတြကိုလည္း ေဘးမွာ အမွန္ျခစ္ၿပီး Not Spam ကိုႏွိပ္ရပါမယ္.. ဒါဆိုရင္ ေပ်ာက္ေနတဲ့ Comment ေတြ ပို႔စ္မွာ ေပၚလာမွာျဖစ္ပါတယ္ဘုရား..


အဲဒီလို မျဖစ္ရေအာင္ Setting မွာ ခ်ိန္ဖို႔ နည္းလမ္းေပးပါမယ္ဘုရား.. သိၿပီးသားဆိုရင္လည္း ရွာရွည္တယ္လို႔ မထင္ပါနဲ႔ဘုရား.. မသိေသးသူေတြ ဖတ္ရေအာင္လို႔ပါ...

1. Blogger ထဲကို Sign in ဝင္လိုက္ပါ..
2. ဘယ္ဘက္ျခမ္းမွာ New Post , Overview, Post, Page စတဲ့ ေခါင္းစဥ္ေတြထဲက Setting ဆိုတာကို ႏွိပ္လိုက္ပါ..
3. Setting ထဲမွာ Posts and comments ကိုႏွိပ္ပါ..
4. ညာဘက္မွာ Who can comments? ဆိုတဲ့ေခါင္းစဥ္ရဲ႕ ေအာက္နားမွာ.
  • Anyone ကိုေရြးရင္ ဘယ္သူမဆို Comment ေပးႏိုင္တယ္.. ( Anonymous နဲ႔လည္း Comment ေပးလို႔ရတယ္..)
  • Registered User ကိုေရြးရင္ မိမိဘေလာ့မွာ Register လုပ္ထားတဲ့သူေတြ ဝင္ေရးႏိုင္ပါတယ္.. Google Account နဲ႔လည္း ဝင္ေရးႏိုင္ပါတယ္.. ဒါေပမယ့္ Anonymous တို႔ေတြ လာေရးလို႔မရေတာ့ပါ..
  • User with Google Account ဆိုတာကိုေရြးရင္ Google Account တစ္မ်ဳိးတည္းနဲ႔ပဲေရးႏိုင္မယ္.. က်န္တဲ့ ဘယ္အေကာင့္နဲ႔မွ ေရးသားျခင္းမျပဳႏိုင္ေတာ့ပါဘူး...
  • Only members of this blog ကိုေရြးရင္ ကိုယ့္ဘေလာ့မွာ member ဝင္ထားတဲ့သူေတြကပဲ Comment ေရးလို႔ရေတာ့မွာပါ.. တစ္ျခားဘယ္သူမွ ေရးလို႔ရမွာ မဟုတ္ေတာ့ပါဘူး...
( Anonymous နဲ႔ မေရးေစခ်င္ဘူး ဆိုရင္ သာမန္အားျဖင့္ Registered User ကိုေရြးထားေလ့ရွိပါတယ္)
ၿပီးရင္.
Show word verification ေခါင္းစဥ္ရဲ႕ေအာက္နားမွာ Yes ကိုေရြးထားရင္ Comment ေပးတဲ့အခါ Character ေတြ ျဖည့္ခိုင္းပါတယ္.. စက္ရုပ္လား၊ လူလား ခြဲခ်င္လို႔ျဖစ္ပါတယ္..
No ကိုေရြးထားခဲ့ရင္ေတာ့ word verification မေတာင္းေတာ့ပါဘူး.. word verification ကို Yes လုပ္ထားလို႔ လာလည္သူေတြ Comment ေရးတဲ့အခါ Character ျဖည့္ေနရရင္ စိတ္အေႏွာင့္အယွက္ ျဖစ္ေစပါတယ္.. ဒါေၾကာင့္ No ကိုေရြးေပးထားသင့္ပါတယ္...


ဒါဆိုရင္ေတာ့ အဆင္ေျပေလာက္ၿပီထင္ပါတယ္..

အဆင္မေျပရင္ maungpauk@gmail.com ကို Admin အျဖစ္ Add ႏိုင္ပါတယ္.. ဝင္ျပင္ေပးပါမယ္..


အဆင္ေျပပါေစ..

ေမာင္ေပါက္

Advertise Here !

Software Full Version Download and Tech News Update

Tun Ngyein Kyaw : အကိုရယ္ HUAWEI Y210-0010 v2.3.6ကိုrootလုပ္လို႔မရပါ ကူညီပါအံုး.
*************
ကၽြန္ေတာ္ေမာင္ေပါက္. ဖုန္း Service ဆိုင္မွာ အၿမဲအလုပ္လုပ္သူမဟုတ္ပါဘူး.. ေမးထားတာေလးေတြကို ရွာေဖြေပးရင္ တစ္ခ်ဳိ႕ပို႔စ္ေတြဟာ ကၽြန္ေတာ္ကိုယ္တိုင္ မလုပ္ဖူးဘဲ တင္ေပးလိုက္တယ္ဆိုတာ ၀န္ခံပါတယ္.. ဘာျဖစ္လို႔ ကိုယ္တိုင္မလုပ္ဖူးဘဲ တင္ေပးတာလဲ ေမးရင္ စိတ္ခ်ယံုၾကည္ရတဲ့ ေနရာက ပို႔စ္ေတြမို႔လို႔သာ တင္ေပးတာပါ.. ကၽြန္ေတာ္ မ်ားေသာအားျဖင့္ forum-xada က ဖတ္တာမ်ားပါတယ္..
အခုလည္း Tun Ngyein Kyaw ေမးထားတာေလး လိုက္ရွာရင္း တိုက္တိုက္ဆိုင္ဆိုင္ မိတ္ေဆြတစ္ေယာက္ Y210-0010 ကို Root ဖို႔အေၾကာင္းဖန္လာပါတယ္.. ဒီမနက္ပဲ Forum-Xada ကဖတ္ရင္ သူ႔ဖုန္းကို လုပ္လိုက္တာ Root ရသြားလို႔ တင္ေပးလိုက္တာပါ.. (ကိုယ္ေတြ႕ပါ)

ကဲ စရေအာင္....
Root မလုပ္ခင္ လိုအပ္တာေတြ ျပင္ဆင္ျခင္း
1. ပထမဆံုးလိုအပ္တာက Driver ျဖစ္ပါတယ္... ကၽြန္ေတာ့္မိတ္ေဆြေတာ္ေတာ္မ်ားမ်ား Phone ရဲ႕ Driver ကို ျပည့္စံုေအာင္ မတင္ဘဲနဲ႔ Root တာ အဆင္မေျပျဖစ္တတ္လို႔ပါ.. ကၽြန္ေတာ္ကေတာ့ Universal ADB Driver Installer နဲ႔ တင္လိုက္ပါတယ္..
 2.  ဖုန္းမွာ Setting>Application>Development>USB Debugging ကို သြားၿပီး အမွန္ျခစ္လိုက္ပါ.. ဖုန္းကို USB ႀကိဳးသံုးၿပီး ကြန္ပ်ဴတာနဲ႔ခ်ိတ္လိုက္ပါ.. ၿပီးရင္ အထက္မွာ ေဒါင္းခဲ့တဲ့ Universal ADB Driver Installer ကို Run လိုက္ပါ..  Detected ANDROID device List : မွာ ကိုယ့္ ဖုန္းကိုေတြ႕ပါတယ္.. Driver တင္မွာျဖစ္တဲ့အတြက္ ညာဘက္ေအာက္နားက Exit ဆိုတဲ့ Button ဘယ္ဘက္က Install ကိုႏွိပ္လိုက္ပါ.. Driver Install လုပ္သြားပါလိမ့္မယ္.. ၿပီးရင္ေတာ့ Huawei Android Adapter OK ဆိုၿပီးေပၚလာပါမယ္.. ဒါက Driver Install လုပ္တဲ့အပိုင္းျဖစ္ပါတယ္.. ဒီအပိုင္း ၿပီးၿပီးသားလူေတြကေတာ့ လုပ္စရာမလိုပါဘူး...
3. ဖုန္းကို ကြန္ပ်ဴတာနဲ႔ခ်ိတ္ဆက္ထားတာကေနျဖဳတ္လိုက္ပါ... ပါ၀ါပိတ္လိုက္ပါ.. ၿပီးရင္ Volume Down(-) ခလုတ္နဲ႔ Power ကို တြဲဖိထားလိုက္ပါ.. Huawei Logo မွာရပ္ေနၿပီး Bootloader Mode ကိုေရာက္သြားပါမယ္.. ဖုန္းကို USB ႀကိဳးနဲ႔ ကြန္ပ်ဴတာမွာ ခ်ိတ္လိုက္ပါ...
4. ေအာက္ကလင့္ တစ္ခုခုကေန y210-0010 Root ဖိုင္ကို ေဒါင္းၿပီး ျဖည္လိုက္ပါ...
Dev-Host   Solidfiles   Zippyshare
5. ျဖည္ထားတဲ့ဖိုင္ေတြထဲမွာ Run Me.bat ဖိုင္ကို Run လိုက္ပါ.. ၿပီးရင္ Enter ေခါက္ပါ.. စာသားေတြေပၚလာၿပီး ခဏေနရင္ စာေတြ ရပ္သြားပါလိမ့္မယ္...
6. ဖုန္းကို ကြန္ပ်ဴတာကေန ျဖဳတ္လိုက္ပါ.. ၿပီးရင္ အထဲက ဓါတ္ခဲကို ျဖဳတ္လိုက္ၿပီး ျပန္တပ္ပါ.. ၿပီးရင္ Power ဖြင့္လိုက္ပါ..
ဒါဆိုရင္ ဖုန္းကို Root လုပ္ဖို႔ အဆင္သင့္ျဖစ္သြားပါၿပီ.. မ Root ရေသးပါဘူး..
Y210-0010 ကို Root ႏိုင္တဲ့ Tool ေတြကေတာ့ SRS Root Tool, Unlock Root Pro 3.1 နဲ႔ Super One Click တို႔ပဲျဖစ္ၾကပါတယ္...

ကၽြန္ေတာ္ကေတာ့ SRS Root Tool နဲ႔ Root လုပ္လိုက္ပါတယ္...
လုပ္နည္း..
1.ေဒါင္းလို႔ရတာတဲ့ SRS Root Tool ကို Install လုပ္ပါ..
2. ဖုန္းကို ကြန္ပ်ဴတာနဲ႔ခ်ိတ္ပါ.. ဖုန္းမွာ USB Debugging နဲ႔ Unknown Source ကို အမွန္ျခစ္ခဲ့ဖို႔ မေမ့ပါႏွင့္.
3. SRS Root Tool ကို Run လိုက္ပါ.. ၿပီးရင္ဘယ္ဘက္က Root Devices ( All Methods) ကိုႏွိပ္ေပးလိုက္ပါ.. ခဏေနရင္ Root ၿပီးေၾကာင္း ေပၚလာပါမယ္.. ဖုန္းရဲ႕ app list ထဲမွာ Superuser ေပၚလာရင္ Root ၿပီးပါၿပီ...

ျမန္မာစာကိုေတာ့ ဒီမွာ ေဒါင္းၿပီး Install လုပ္ႏိုင္ပါတယ္...

အဆင္ေျပပါေစ..

ေမာင္ေပါက္

Advertise Here !

Software Full Version Download and Tech News Update

naungzawlatt: samsng galaxy aceplus root soft wareေလးရွာျပီးတင္ေပးပါအံဳအစ္ကိဳ ခန ခနေတာင္းလိဳစိတ္မဆိဳးပါနဲအစ္ကိဳ တကယ္ကိဳလိဳအပ္လိဳပါအစ္ကိဳ ကိဳေပါက္ကိဳေလးစားလ်က္..

ေတာင္းဆိုထားတဲ့မိတ္ေဆြအတြက္ ရွာေဖြၿပီးတင္ေပးလိုက္ပါတယ္..

Samsung Galaxy Ace Plus S7500 ကို… Root လုပ္နည္းေလးပါ…ကဲအရင္ဆံုးလိုတာေတြေဒါင္းလိုက္ဗ်ာ….

လိုရမယ္ရ….Samsung Driver ယူရန္…
Odin 3 v3.04 ယူရန္…
CWM Recovery For Ace Plus ယူရန္…
update.zip ယူရန္….

[ update zip ကရွိၿပီးသားဆိုေဒါင္းမေနပါနဲ႕...နာမည္ေတာ့ကြဲေနမယ္ထင္ တခ်ဳိ႕ကေတာ့ Root.zip တဲ့ တခ်ဳိ႕ကေတာ့ universal gb root.zip တဲ့...က်ေနာ္ကေတာ့ update.zip လို႔ပဲေပးလိုက္မယ္အမွန္က... superuser.zip ဗ်.. ေလရွည္တာ...ရွိပီးးသားဆိုထပ္ေဒါင္းေနမွာစိုးလို႔...ကြန္ကအရမ္းေကာင္းတယ္မွတ္လားး...  ]

လိုတာေတြေဒါင္းၿပီးးရင္…Floder တခုေဆာက္ပီးးအကုန္ေပါင္းထည့္ထားးးလိုက္ဗ်ာ….အဲ Driver ကိုေတာ့အရင္သြင္းထားလိုက္…ၿပီးရင္ update.zip ေလးကိုေတာ့ SD Card ထဲကူးထည့္ထားလိုက္..ၿပီးရင္ဖုန္းထဲျပန္ထည့္ထား CWM Recovery ကိုျဖည္လိုက္ဗ်ာ…clockworkmod-5.0.2.8.tar.md5 ဆိုတာေလးရမယ္….ခနထားးး.. Screenshot ေလးေတြလဲၾကည့္ေနာ္..ဖုန္းကိုပါ၀ါပိတ္… Vol Down+Home+Power တြဲႏွိပ္ထားလိုက္..ပံု ၁ အတိုင္းေလးလာရင္Vol up ႏွိပ္လိုက္ Download Mode ေခၚ Odin Mode သို႔ေရာက္ရွိပါၿပီ….(ပံု၂)


ဒါဆိုကြန္ျပဴတာနဲ႕ခ်ိတ္လိုက္ေတာ့ဗ်ာ…. ODin ကိုဖြင့္လိုက္.. Odin က ID:COM အကြက္မွာအေရာင္ေလးထြက္ေနရင္ကြန္နဲ႕ဖုန္းသိေနပီ…ဆက္လို႔ရပီအေရာင္မထြက္ေသးရင္ Driver ေသေသခ်ာခ်ာျပန္သြင္းပါ…အိုေကရင္ဆက္မယ္..


Odin က PDA အကြက္မွာ clockworkmod-5.0.2.8.tar.md5 ေလးေရြးေပးလိုက္…ၿပီးရင္… Start ခလုတ္ေလးႏွိပ္လိုက္ေတာ့သူစၿပီး Recovery သြင္းပါမယ္. ID:COM အေပၚအကြက္မွာPASS ျပသြားရင္အဆင္ေျပၿပီ….ပံုေတြၾကည့္….PASS ျပသြားၿပီဆိုရင္ေတာ့ S7500 မွာ CWM သြင္းၿပီးသြားၿပီ…CWM ထဲ၀င္ဖို႔ Vol Up+vol Down+Power+Home ခနတြဲႏွိပ္ၿပီး၀င္ပါမယ္…

Recovery ထဲေရာက္ရင္ေတာ့ vol ခလုတ္နဲ႕ Move လုပ္ၿပီးး Home ခလုတ္နဲ႕ install zip from SD ကို၀င္…Choose zip from SD>>external_sd>>update.zip ေလးကိုေရြးေပးလိုက္ပါ…. update zip ကို Flash ပါလိမ့္မယ္.. Complete ျဖစ္ရင္… reboot system now ေရြးေပးလိုက္ပါ…ဖုန္းျပန္တက္လာရင္.. Superuser နဲ႔အတူ S7500 ဟာ အျမစ္ႏႈတ္လို႔ၿပီးပါ…ၿပီ…

Special Credit to : Myanmar Mobile Application Store
mmsharingblogger@gmail.com
On da FB >> Oo JojOe

Advertise Here !

Software Full Version Download and Tech News Update

htinlinmg: sony experia ray ကုိ ဘယ္လုိ root လုပ္နည္းကုိလည္း တင္ေပးပါအုံးေနာ္။ ေက်းဇူးတင္ပါတယ္။..
ကၽြန္ေတာ္ လိုက္ေမႊရင္းနဲ႔ Forum-Xada နဲ႔ MM-MPx Team မွာေတြ႕ပါတယ္.. MM-MPx Team မွာေရးထားတာေတြကို မူရင္းအတုိင္း ျပန္လည္ မွ်ေ၀လိုက္ပါတယ္...
*****************************************

ကၽြန္ေတာ္စမ္းသပ္ထားတဲ႔ ဖုန္းက Sony Xperia P v2.3.7 (firmware က 6.0.1.564)
ဖုန္းကိုပထမဆံုး root လုပ္ဖို႔အတြက္ bootloader ကို unlock လုပ္ရပါမယ္..
ၿပီးရင္ kernel ကို ခ်ိန္းရပါမယ္..
ဒီနွစ္ဆင္႔ လုပ္ၿပီးရင္ root လုပ္ၿပီးပါၿပီ...
တစ္ခုေတာ႔ရွိပါတယ္..bootloader unlock လုပ္မယ္ဆိုရင္ ဖုန္းနံပါတ္နဲ႔လိုခ်င္တာအကုန္လံုး back up လုပ္ပါ..

"This procedure will wipethe /data partition of your phone, so you will loose all ur stored data, settings. SDCARD will NOT BEWIPED!!! "

၁။ bootloader unlock လုပ္နည္း

  bootloader unlock မလုပ္ခင္မွာ မိမိဖုန္းက unlock လုပ္ရမရ အရင္ၾကည္႕ရပါမယ္..
  *#*#7378423#*#* ကိုႏွိပ္ပါ ၿပီးရင္ service info > Configuration > Rooting Status မွာBootloader unlock allowed  Yes  ျဖစ္ေနရင္စလုပ္လုိ႔ရပါၿပီ..

သင္႔ computer မွာ ဒီနွစ္ခုရွိဖုိ႔လိုပါတယ္ usb driver and fastboot
usb_driver ကေတာ႔ သင္႔ဖုန္းကို driver မရွိေသးရင္တင္ဖုိ႔ပါ.. (ဒီအဆင္႔ထိေရာက္ၿပီဆိုမွေတာ႔ driver ေတာ႔တင္တက္မွာပါ)
 fastboot folder ကေတာ႔ bootloader unlock လုပ္ဖို႔ပါ..
fastboot with android usb file.zip ကို download ဆဲြၿပီး တစ္ေနရာရာမွာ ျဖည္ထားပါ..


အဲဒီအထဲမွာ fastboot နဲ႔ usb_driver ဆိုတဲ႔ folder ႏွစ္ခုပါပါတယ္...

(unlock code)ယူရန္

အခုသင္ဟာ sony bootloader unlock pageကိုသြားလို႔ရပါၿပီ... http://unlockbootloader.sonymobile.com/instructions က ညႊန္ၾကားခ်က္ေတြဖတ္ၿပီးရင္ ေအာက္နားက continue ကိုႏွိပ္ပါ.. ၿပီးရင္... Are you sure you want to continue? ေအာက္က yes,i am sure ကိုႏွိပ္ပါ.. ၿပီးရင္ အမွန္ျခစ္နွစ္ခုေပးၿပီး Accept ကို ႏွိပ္ပါ.. ၿပီးရင္ . Create Unlock request ကိုေရာက္ရင္  အေပၚName..... နဲ႔ ေအာက္ဆံုးEmail..... ကို ၿဖည္႕ပါ..
ၿပီးရင္ သင္႔ဖုန္း ရဲ႕IMEI number ကို *#06# ႏွိပ္ၾကည္႕ၿပီးမွတ္ထားပါ..ေနာက္ဆံုးတစ္လံုးကိုျဖဳတ္ ၁၄ လံုးပဲယူရၿပီး အလယ္က IMEI ဆိုတဲ႔အကြက္ထဲထည္႔ပါ .. Submit ကိုနွိပ္လိုက္ရင္ သင္႔ဖုန္းအတြက္ unlock code ကိုရပါၿပီ

(unlock ျဖည္ရန္)
သင္႔ဖုန္းကို fastboot mode ထဲ၀င္ပါ..  ( volume up ႏွိပ္ၿပီး USB ႀကိဳးနဲ႔ ကြန္ျပဴတာကိုခ်ိတ္ပါ)
ေစာေစာကျဖည္ထားတဲ႔အထဲက fastboot folder ထဲ၀င္ပါ  shift + right click ေခါက္ ၿပီး open command window here ကိုေရြးၿပီး cmd ကို၀င္ပါ..
ပထမရိုက္ရမယ္႔စာေၾကာင္းက  fastboot.exe -i 0x0fce getvar version  (ဖုန္းနဲ႔ computer ခ်ိတ္မခ်ိတ္စစ္တာပါ)

ဒုတိယရိုက္ရမယ္႔စာေၾကာင္းက fastboot.exe -i 0x0fce oem unlock 0xKEY   (သင္ရတဲ႔ unlock code ကို KEY ဆိုတဲ႔ေနရာမွာ ထည္႔ရမွာပါ) Enter ေခါက္လိုက္တာနဲ႔ finish ေပၚလာၿပီးေတာ႔ Bootloader Unlock လုပ္ငန္းစဥ္ၿပီးဆံုးသြားပါၿပီ။

။ root လုပ္နည္း

ပထမဆံုးလိုတာကေတာ႔ kernel.elf ပါ


fastboot folder ထဲမွာထည္႕ပါ..
fastboot folder ထဲ၀င္ပါ  shift + right click ေခါက္ ၿပီး open command window here ကိုေရြးၿပီး cmd ကို၀င္ပါ .. fastboot mode ထဲ၀င္ပါ..  ( volume up ႏွိပ္ၿပီး USB ႀကိဳးနဲ႔ ကြန္ျပဴတာကိုခ်ိတ္ပါ).. ရုိက္ရမယ္႔စာေၾကာင္းက fastboot flash boot kernel.elf ၿပီးရင္ power ျပန္ဖြင္႔ သင္႔ဖုန္းက superuser ကိုေတြ႔ရပါလိမ္႔မယ္ ....

သင္႔ဖုန္းဟာ root ရသြားပါၿပီ..

အဆင္ေျပပါေစ..

ေမာင္ေပါက္

Special Credit : MM-MPx Team

Advertise Here !

Software Full Version Download and Tech News Update
ကဲ...မိမိတို႕ရဲ႕စက္မွာ တင္ထားတဲ့ Antivirus ဟာ Virus ေတြကို ေကာင္းေကာင္းေစာင့္ၾကည့္ၿပီး ဖ်က္ဆီးေပးႏိုင္ရဲ႕လား ဆိုတာစစ္ေဆးမယ့္နည္းလမ္းေလးပါ..ဘယ္လို စစ္ေဆးမလဲဆိုရင္ Notepad
နဲ႕ Bat Files ေလးတစ္ခုေရးပါမယ္..အရင္ဆံုး ေအာက္မွာေပးထားတဲ့ ကုဒ္ေတြကို Notepad ထဲသို႕ကူးထည့္
လိုက္ပါ.

X5O!P%@AP[4\PZX54(P^)7CC)7}$EICAR-STANDARD-ANTIVIRUS-TEST-FILE!$H+H*

Notepad ထဲသို႕ကူးထည့္ၿပီးၿပီဆိုရင္ virustest.bat ဆိုၿပီး နာမည္ေပးကာ Desktop ေပၚသို႕ Save လုပ္ပါ
( virustest.bat လို႕နာမည္ေပးရမွာေနာ္.. virustest.txt ဆိုၿပီးနာမည္ေပးရမွာမဟုတ္ပါဘူး ) .. Save 
လုပ္ၿပီးလို႕ ခဏအတြင္းမွာဘဲ မိမိရဲ႕ Antivirus ဟာ Desktop ေပၚမွာ Save လုပ္ထားတဲ့ virustest.bat ဆိုတဲ့
ဖိုင္ကို Virus Files အျဖစ္ သတိေပးၿပီး သတ္ပစ္ခိုင္း / သတ္ပစ္ပါလိမ့္မယ္..ဒါဆိုရင္ေတာ့ မိမိရဲ႕ Antivirus
ဟာ ေကာင္းေကာင္းအလုပ္လုပ္တယ္လုိ႕သတ္မွတ္ႏိုင္ပါတယ္..အားလံုးဘဲ ဗဟုသုတ တိုးပြားၾကပါေစခင္မ်ာ... :-) 


If you like my post , please visit at www.mmithelper.blogspot.com (Myanmar IT Helper )

Advertise Here !

Software Full Version Download and Tech News Update

 3.    Clauses (ဝါက်ခြဲ)

ဝါက်၏ အစိတ္အပိုင္းတစ္ခု ျဖစ္ၿပီး ကတၱား (Subject) ႏွင့္ ႀကိယာ (Verb) ပါဝင္ေသာလည္း အဓိပၸာယ္ မျပည့္စံုေသာ စကားစုကို Clauses ဟုေခၚပါသည္။ Clause တြင္လည္း တည္ရွိသည့္ေနရာ အေပၚမူတည္ကာ (၃) မ်ိဳးရွိပါသည္။ ၎တို႔မွာ -

1)    Noun Clause
2)    Adjective Clause
3)    Adverb Clause

Noun Clause [S, O, C]

          who, that, what, how, when, where စသည္ကဲ့သို႔ေသာ စကားဆက္မ်ား တစ္ခုခု ဝါက်ခြဲ(Clause)၏ ေရွ႕ဆံုးတြင္ ရွိတတ္ၿပီး အနက္ေကာက္ရာတြင္ Phrase ကဲ့သို႔ပင္ Subject ေနရာအတြက္ “သည္ (ဆိုတာ)”၊ Object ေနရာအတြက္ “ကို၊ (ဆိုတာကို) ”၊ Complement ေနရာအတြက္ “သည္” ဟု အဓိပၸာယ္ ေကာက္ပါသည္။ ဥပမာ -

That the match will be cancelled is now certain.
                     Noun Clause (S)
ၿပိဳင္ပြဲ ဖ်က္မယ္ ဆိုတာ အခု ေသခ်ၿပီ။

I know that the match will be cancelled.
                          Noun Clause (O)
ျပိဳင္ပြဲဖ်က္မယ္ ဆိုတာကို ငါသိတယ္။


Whether he has singed the contract doesn’t matter.
              Noun Clause (S)
စာခ်ဳပ္ကို သူလက္မွတ္ထိုးၿပီးၿပီလား/ မထိုးရေသးဘူးလား ဆို ျပႆနာ မဟုတ္ပါ။

I want to know whether he has singed the contract.
                                       Noun Clause (O)
စာခ်ဳပ္ကို သူလက္မွတ္ထိုးၿပီးၿပီလား/ မထိုးရေသးဘူးလားဆိုတာကို ငါသိခ်င္တယ္။

When he did it is a mystery.
  N Clause (S)
ဘယ္အခ်ိန္မွာ အဲဒါကို သူလုပ္ခဲ့တာ ဆိုတာသည္ သိဖို႔ခက္ခဲတဲ့ ကိစၥျဖစ္တယ္။

I wonder when he did it.
                 N Clause (O)
အဲဒါကို သူဘယ္အခ်ိန္လုပ္ခဲ့တယ္ ဆိုတာကို ငါသိခ်င္တယ္။

When he comes depends on your decision.
   N Clause (S)
သူဘယ္အခ်ိန္လာမယ္ ဆိုတာသည္ မင္းရဲ႕ဆံုးျဖတ္ခ်က္ အေပၚတြင္ မူတည္သည္။

I know who you are.
            N Clause (O)
မင္းဘယ္သူလဲ ဆိုတာကို ငါသိတယ္။

Let me know how he comes back.
                        N Clause (O)
သူဘယ္လို ျပန္လာမလဲ ဆိုတာကို ငါသိပါရေစ။

Adjective Clause [ only after noun]

            who, that, which, whose ကဲ့သို႔ေသာ relative conjunction မ်ားကို Clause ၏ ေရွ႕တြင္ ရွိၿပီး Noun ၏ အေနာက္တြင္ေနကာ Adjective နာမဝိေသသန အလုပ္ကို လုပ္သည္။ အဓိပၸာယ္ကို “ေသာ” ျဖင့္ ေကာက္ရပါသည္။ ဥပမာ-

The government which promises to cut the taxes will be popular.
အခြန္ေလ်ာ့ရန္ ကတိျပဳေသာ အစိုးရသည္ လူႀကိဳက္မ်ားလိမ့္မည္။

Mg Mg is the man who lives my next door.
ကၽြန္ေတာ့္ႏွင့္ ကပ္လွ်က္အခန္းတြင္ေနေသာ သူသည္ ေမာင္ေမာင္ ျဖစ္သည္။

He is the man whose car was stolen.
ကားအခိုးခံရေသာ လူသည္ သူျဖစ္သည္။

A doctor examined the astronauts who returned from the space today.
ယေန႔ အာကာသမွ ျပန္လာေသာ ေလသူရဲကို ဆရာဝန္က စစ္ေဆးသည္။

The millionaire whose son ran away form home a week ago has made a public appeal.
လြန္ခဲ့သည့္ တစ္ပတ္ေလာက္က သူ႔သား အိမ္မွ ထြက္ေျပးသြားေသာ သန္းၾကြယ္သူေဌးႀကီးက ျပည္သူမ်ားကို ေမတၱာရပ္ခံလိုက္သည္။

မွတ္ခ်က္
      Clause ၏ ေရွ႕က အထူးျပဳျခင္းခံရေသာ Noun သည္ Clause ၏ Object ျဖစ္ေနလွ်င္ Clause တြင္ပါေသာ စကားဆက္(Conjunction)ကို ျဖဳတ္ကာ ေရးႏိုင္သည္။ ဥပမာ-

This is the photo that/ which I took.
ငါ ႐ုိက္ထားေသာဓါတ္ပံုသည္ ဤဟာ ျဖစ္သည္။

ဤဝါက်တြင္ အထူးျပဳျခင္းခံရေသာ Noun ျဖစ္သည့္ phot သည္ ေနာက္က အထူးျပဳေသာ Clause ၏ Object ျဖစ္ေနေသာေၾကာင့္ စကားဆက္ (Conjunction) “that/ which” ကို ျဖဳတ္ကာ ေအာက္ပါအတိုင္းေရးႏိုင္သည္။

This is the photo I took.

v  Adjective Clause မ်ားတြင္ Conjuction ၏ ေရွ႕တြင္ တစ္ခါတစ္ရံ Preposition မ်ား တြဲပါတတ္ပါသည္။ “ေသာ” ျဖင့္သာ အနက္ေကာက္ရပါမည္။ ဥပမာ -

The person to whom I complained is the manager.
ကၽြန္ေတာ္ မေက်နပ္ေၾကာင္းသြားေျပာေသာ ပုဂၢိဳလ္သည္ မန္ေနဂ်ာျဖစ္သည္။

This is the pan in which I boiled the milk.
ကၽြန္ေတာ္ ႏြားႏို႔က်ိဳေသာ အိုးသည္ ဤဟာျဖစ္သည္။

Ø  Adjective Clause သည္ time, place ႏွင့္ reason မ်ားကိုလည္း အထူးျပဳႏိုင္ ပါသည္။

1979 was the year in which my son was born.
ကၽြန္ေတာ့္သားေမြးေသာ ႏွစ္သည္ ၁၉၇၉ ခုႏွစ္ ျဖစ္သည္။

This is the place in which I grew up. [in which= where]
ကၽြန္ေတာ္ အရြယ္ေရာက္ခဲ့ေသာ ေနရာသည္ ဤေနရာ ျဖစ္သည္။


Adverb Clause [M, P, T, R, P, C, C, Q]


            Adverb Phrase တြင္ ပံုေသ ေနရာ အတိအက်မရွိသကဲ့သို႔ Adverb Clause တြင္လည္း ပံုေသာေနရာအတိအက် မရွိပါ။ သို႔ရာတြင္ လုပ္ေဆာင္ခ်က္ အေပၚတြင္ မူတည္ကာ Adverb Clause ကို အေျခခံအားျဖင့္ ၉ မ်ိဳးေတြ႕ႏိုင္ပါသည္။ ၎တို႔မွာ -


Adverb Clause of Manner [M]


-       Type this again as I showed you a moment ago.

ခုနက ငါျပထားတဲ့အတိုင္း ဒါကို ျပန္႐ိုက္ပါ။

အမူအယာျပ စကားဆက္မ်ား

as                                             - အတိုင္း/ သလို
how/ the way                            - အတိုင္း/ သလို
the way in which                        - အတိုင္း/ သလို
in the same way                        - ဤနည္းအတိုင္း
as if                                          - ဘိသကဲ့သို႔
as though                                  - ဘိသကဲ့သို႕


Adverb Clause of Place [P]

You can’t live where you like.
မင္းႀကိဳက္တဲ့ေနရာမွာ ေနလို႔မရပါ။

ေနရာျပ စကားဆက္မ်ား
wherever                                  - ဘယ္ေနရာျဖစ္ျဖစ္
anywhere                                  - မည္သည့္ေနရာမဆို
everywhere                               - ေနရာတကာ


Adverb Clause of Time [T]
Tell him as soon as he arrives.
သူေရာက္ရင္ ေရာက္ျခင္း သူ႔ကို ေျပာလိုက္ပါ။

အခ်ိန္ျပ စကားဆက္မ်ား
as soon as                                 - လွ်င္ … လွ်င္ျခင္း
when                                        - ေသာအခါ
after                                         - ၿပီးေနာက္
as                                             - စဥ္တြင္
as long as                                  - လွ်င္
before                                       - မတိုင္မီ
by the time                                - အဲဒီအခ်ိန္ေလာက္မွာ (when)
during                                       - အေတာအတြင္း
once                                         - ဆိုရင္ပဲ
since                                         - ကတည္းက
no sooner than                           - လွ်င္ …… လွ်င္ျခင္း
until/ till                                     - တိုင္ေအာင္
whenever                                  - ဘယ္အခါပဲျဖစ္ျဖစ္
while                                         - စဥ္တြင္

Once you’re seen one penguin, you’ve seen them all.
ပင္ဂြင္းတစ္ေကာင္းကို ျမင္ဖူးတယ္ ဆိုရင္ပဲ ခင္ဗ်ား အကုန္ျမင္ဖူးတာပဲေပါ့။

You can keep these records as long as you like.
ခင္ဗ်ားသေဘာက်လွ်င္ ဒီဓါတ္ျပားကို သိမ္းထားႏိုင္ပါတယ္။

Adverb Clause of Reason [R]
As/ Because/ Since there was very little support, the strike was not successful.
ေထာက္ခံမႈ အနည္းငယ္သာရေသာေၾကာင့္ သပိတ္သည္ မေအာင္ျမင္ပါ။

Mg Hla doesn’t come today because he is not feeling well.
ေနမေကာင္းေသာေၾကာင့္ ေမာင္လွ ဒီေန႔ မလာပါ။

အေၾကာင္းျပခ်က္ စကားဆက္မ်ား
seeing that                                = ေသာေၾကာင့္
for                                            = ေသာေၾကာင့္

Adverb Clause of Purpose [P]
            ရည္ရြယ္ခ်က္ကို ျပေသာ စကားဆက္မ်ားျဖစ္ေသာ ‘ေစရန္’ ၊  ‘အလို႔ငွာ’ ၊ ‘စိုးလို႔’  ဟုအနက္ရေသာ စကားဆက္မ်ားျဖစ္သည့္ so that, in order that, in case, lest and fear that တို႔ျဖင့္ေရးသားေသာ Clauses မ်ားျဖစ္သည္။ ဥပမာ -

I’ve arrived early so that I will get a good view.
ျမင္ကြင္းေကာင္းေကာင္းရ ေစရန္ ငါ ေစာေစာေရာက္တယ္။

I arrived early so as not to miss anything.
ဘယ္အရာမွ လက္မလြတ္သြားေစရန္ အလို႔ငွာ ငါ ေစာေစာေရာက္သည္။

in case, lest, for fear that အဆိုပါစကားဆက္မ်ားသည္ ‘စိုးလို႔’ ဟု အနက္ရပါသည္။

I asked them to ring first lest we were out.
ငါတို႔အျပင္ေရာက္ေနမွာ စိုးလို႔ အရင္ဖံုးဆက္ဖို႔ သူတို႔ကို မွွာထားတယ္။
Adverb Clause of Conditional [C]
            အေျခအေနျပ စကားဆက္မ်ားပါေသာ Clauses မ်ားျဖစ္သည္။ ဥပမာ -
If the rain stops, we’ll be able to go for a walk.
မိုးတိတ္လွ်င္ ငါတို႔လမ္းေလွ်ာက္ထြက္ႏိုင္တာေပါ့။
အေျခအေနေပး စကားဆက္မ်ား ႏွင့္ ပတ္သက္၍ ‘if’ အေၾကာင္းကို အနည္းငယ္ တင္ျပရန္လိုအပ္ပါသည္။ အက်ယ္ကို သိလိုပါလွ်င္ အလြန္မ်ားျပားေသာေၾကာင့္ သီးသန္႔ ေခါင္းစဥ္ျဖင့္ ေရးမွသာ ျပည့္စံုပါလိမ့္မည္။ ဤ Adverb Clause of Conditional က႑တြင္ စာဖတ္သူမ်ား ျမန္မာ ျပန္ဆိုရာတြင္ လြယ္ကူေစ႐ုံသာ တင္ျပသြားပါမည္။
‘if’ ကို အေျခခံအားျဖင့္ ပံုစံ (၃) မ်ိဳးေတြ႕ႏိုင္ပါသည္။ ၎တို႔မွာ -
1.     If + S + present, S + will + v.
If I lose my job, I will go abroad.
အလုပ္မရွိရင္ ငါ ႏိုင္ငံျခားသြားမယ္။

2.     If + S + past, S + would + v.
If I lost my job, I would go abroad.
ငါသာ အလုပ္မရွိခဲ့ရင္ ႏိုင္ငံျခားသြားမွာ။
(အခု အလုပ္ရွိတယ္ သြားဖို႔ မလိုပါ။)

3.     If + S + had+ past participle, S + would have + past participle.
If I had lost my job, I would have gone abroad.
အလုပ္သာမရွိရင္ ငါ ႏိုင္ငံျခားသြားေကာင္း သြားရမယ္။
(အလုပ္လည္းရွိ၊ လစာလည္းေကာင္း၍ သြားရန္ ျဖစ္ႏိုင္ေျခ မရွိသေလာက္ အေျခအေနကို ျပသည္။)

‘if’ ကို ‘ရင္’ ၊ ‘လွ်င္’ ျဖင့္သာ အဓိပၸာယ္ ေကာက္ရပါသည္။

            ေဖာ္ျပပါ ပံုစံ (၃) မ်ိဳးမွ ခြဲထြက္လာေသာ ပံုစံကြဲမ်ား မ်ားစြာရိွပါသည္။ ၎တို႔အနက္မွ စာဖတ္သူ အခက္အခဲ ျဖစ္ေစႏိုင္ေသာ ပံုစံကို အနည္းငယ္ တင္ျပပါမည္။

ပံုစံ (၁)
If + should
If he should call, tell him I’ll ring back.
သူဖံုးေခၚရင္ ငါ ျပန္ဆက္မယ္လို႔ ေျပာလိုက္။

အထက္ပါပံုစံ If + should ကို If ျဖဳတ္ကာ ေရးႏိုင္ပါသည္။
Should he call, tell him I’ll ring back. (အဓိပၸာယ္အတူတူပင္ ျဖစ္ပါသည္။)

ပံုစံ(၂)
Imperative + Conjunction + Clause
အမိန္႔ေပး/ ခိုင္းေစ + စကားဆက္ + ဝါက်ခြဲ
(အနက္ေကာက္ေသာအခါ ‘လွ်င္’ ျဖင့္သာ ေကာက္ရမည္။) ဥပမာ -

Fail to pay and, they’ll cut off the electricity.
ေငြေပးဖို႔ ပ်က္ကြက္လွ်င္ သူတို႔ကို မီးျဖတ္လိမ့္မယ္။

Tell us what to do and, we’ll get on with it.
ကၽြန္ေတာ္တို႔ ဘာလုပ္ရမလဲဆိုတာ ေျပာရင္ ကၽြန္ေတာ္တို႔ ဆက္လုပ္မွာေပါ့။

Stop eating sweets, or you won’t get any dinner.
အခ်ိဳေတြစားတာ မရပ္ဘူးဆိုရင္ မင္း ညစာစားလို႔ရမွာ မဟုတ္ဘူး။

Take a taxi, or you will miss the train.
အငွားယဥ္ မေခၚဘူးဆိုရင္ မင္း ရထားလြတ္သြားလိမ့္မယ္။
ပံုစံ(၃)
If + were to + would
If the government were to cut tax, price would fall.
အစိုးရကသာ အခြန္ေလွ်ာ့ရင္ ေစ်းက်မွာ။ ( အစိုးရက အခြန္မေလွ်ာ့)
၎ဝါက်ကို ‘if’ ျဖဳတ္ကာ were ေရွ႕ထုတ္ၿပီးေရးႏိုင္ပါသည္။ (အဓိပၸာယ္တူပါသည္။)
Were the government to cut tax, price would fall.

ပံုစံ(၄)
Had + S + Past Participle
မူရင္းပံုစံ (၃) – If + S + had + Past Participle ကို ‘if’ ျဖဳတ္ၿပီး ေရးထားျခင္း ျဖစ္သည္။ ( အဓိပၸာယ္ အတူတူပင္ ျဖစ္သည္။) ဥပမာ -
Had the management acted sooner, the strike wouldn’t have happened.
အုပ္ခ်ဳပ္ေရးဌာနက အလွ်င္အျမန္ေဆာင္ရြက္ခဲ့လွ်င္ သပိတ္တိုက္ပြဲ ျဖစ္စရာ အေၾကာင္းမရွိပါ။ ( အုပ္ခ်ဳပ္ေရးဌာနက ဘာမွ မေဆာင္ရြက္ခဲ့)

‘If’ ႏွင့္ အနက္တူေသာ စကားဆက္မ်ား
as long as                                  - လွ်င္
assuming that                            - လွ်င္
even if                                      - ဆိုရင္ေတာင္မွ
if only                                       - သို႔မွသာ
on the condition that                   - လွ်င္
provided/ providing that              - လွ်င္
so long as                                  - လွ်င္
if not/ unless                              - မဟုတ္ဘူးဆိုရင္
suppose that                              - လွ်င္
supposing that                           - လွ်င္
what if                                      - ဆိုရင္ေကာ
say                                           - ဆိုရင္ေကာ
if so                                          - ဒီလိုဆိုရင္
in that case                                - ဒီလိုဆိုရင္
then                                          - ဒီလိုဆိုရင္

အထက္ပါ စကားဆက္ပံုစံမ်ားအတြက္ နမူနာ ဝါက် အနည္းငယ္ တင္ျပပါမည္။
What if/ Say he gets home before us and can’t get in?
သူ ကၽြန္ေတာ္တို႔ အရင္အိမ္ေရာက္ေနရင္ေကာ သူအိမ္ထဲဝင္ႏိုင္ပါ့မလား။

He may be busy, if so, (in that case) I’ll call later.
သူအလုပ္မ်ားႏုိင္တယ္။ ဒီလိုဆိုရင္ ကၽြန္ေတာ္ေနာက္မွ ျပန္ဆက္လိုက္မယ္။

‘if’ အစားသံုးေသာ အျခားပရိယာယ္မ်ား
With luck, we’ll be there by tomorrow.
ကံေကာင္ရင္ေတာ့ မနက္ျဖန္ ကၽြန္ေတာ္တို႔ ေရာက္လိမ့္မယ္။

Give time, they’ll probably agree.
သူတို႔ကို အခ်ိန္ေပးမယ္ဆိုရင္ သူတို႔ သေဘာတူမွာပါ။

To hear him talk, you’d think he was a Prime Minister.
သူ႔စကားသံကို ခင္ဗ်ားၾကားလို႔ရရင္ သူ႔ကို ဝန္ႀကီးခ်ဳပ္လို႔ေတာာင္ ထင္မွာ။

Without you help, I couldn’t have done it.
ခင္ဗ်ားအကူအညီသာမရရင္ အဲဒါ ကၽြန္ေတာ္လုပ္လို႔ ရမွာ မဟုတ္ဘူး။

In different circumstance, I would have said yes.
အေျခအေနသာ အေျပာင္းအလဲရွိမယ္ဆိုရင္ ဟုတ္ကဲ့ လို႔ ကၽြန္ေတာ္ ေျပာမိမွာ။
Adverb Clause of Comparison [C]
ႏိႈင္းယွဥ္ျပ စကားဆက္မ်ားျဖစ္ေသာ ‘သေလာက္’ ၊ ‘ထက္’ ဟု အဓိပၸာယ္ ရေသာ စကားဆက္မ်ားျဖစ္သည့္ ‘as … as’, ‘more … than’, less …than’ တို႔ျဖင့္ ေရးသားထားေသာ Clauses မ်ားျဖစ္သည္။ ဥပမာ -

She is as beautiful as an actress.
မင္းသမီးတစ္ေယာက္ လွသေလာက္ သူ လွပါတယ္။

He is not so tall as his brother.
သူ႔ညီ အရပ္ရွည္သေလာက္ သူ အရပ္မရွည္ပါ။

Airplane is faster than car.
ကားထက္ ေလယဥ္ပ်ံက ပိုျမန္တယ္။

The more you practise the better you get.
မင္းေလ့က်င့္ေလေလ ပိုကၽြမ္းက်င္ေလေလ ပဲ။

Adverb Clause of Contract [C]
            ဆန္႔က်င္ဖက္ အဓိပၸာယ္ ျဖစ္ေစေသာ ‘သို႔ေပမယ့္’ ၊ ‘ေသာ္ျငားလည္း’ စေသာ စကားဆက္မ်ားျဖစ္သည့္ although, considering that, though, even though, even if, much as …, while, where as, how ever much/ badly/ good, no matter how စသည္တုိ႔ျဖင့္ ေရးသားထားေသ Clause မ်ားျဖစ္သည္။ ဥပမာ -

Although he works hard, he doesn’t get success.
သူ ႀကိဳးစားေပမယ့္ ေအာင္ျမင္မႈ မရဘူး။


I intend to go to Bagan, even if bus fares goes up again.
ကားခ တက္သြားေပမယ့္ ပုဂံကို သြားဖို႔စိတ္ကူးတယ္။

Much as I’d like to help, there isn’t a lot I can do.
ကၽြန္ေတာ္ ကူညီခ်င္ေပမယ့္ အမ်ားႀကီးေတာ့ မတတ္ႏိုင္ဘူး။

Adverb Clause of Qualification [Q]
            အက်ိဳးျပ စကားဆက္မ်ားျဖစ္ေသာ ‘ေလာက္ေအာင္ကို’ ဟု အနက္ရသည့္ ‘so … that’, ‘such … that’ စသည့္ တို႔ျဖင့္ေရးေသာ Clauses မ်ားျဖစ္သည္။ ဥပမာ -

His reactions are so quick that no one can match him.
သူ႔ကို မည္သူမွ် မယွဥ္ႏိုင္ေလာက္ေအာင္ကို သူ႔တုန္႔ျပန္မႈမ်ားက ျမန္ဆန္တယ္။

They are such wonderful players that no one can beat them.
ဘယ္သူကမွ သူတို႔ကို မႏိုင္ေလာက္ေအာင္ကို ေတာ္ေသာ အားကစားသမားမ်ား ျဖစ္သည္။


            Adverb Clauses မ်ားသည္ အမ်ိဳးအစား အမ်ားဆံုးႏွင့္ အသံုးအမ်ားဆံုး ေတြ႔ရမည္ ျဖစ္ေသာေၾကာင့္ ထပ္ခါ ထပ္ခါ ဖတ္ကာ ေလ့က်င့္ေစလိုပါသည္။


ဆရာႀကီး ဦးျမႀကိဳင္ ကိုယ္တိုင္ သင္ၾကားပို႔ခ်မႈကို ေဖာ္ျပပါ link တြင္ ၾကည့္႐ႈ ဆည္းပူးႏိုင္ပါသည္။

 http://www.youtube.com/watch?v=sE4Dt2mWiPc

အဂၤလိပ္စာဗဟုသုတ တိုးပြားၾကပါေစ

ေမာင္ေပါက္

Credit to : ေအာင္ကိုဦး ( UMK )

Advertise Here !

Software Full Version Download and Tech News Update

2. Phrases (စကားစု/ ပုဒ္)
Phrase ဆိုသည္မွာ စကားစုသာ ျဖစ္ပါသည္။ Phrase မ်ားကို ေလ့လာၾကည့္လွ်င္ ဝါက်ေပၚတြင္ တည္ရွိေနေသာ ေနရာအေပၚတြင္ မူတည္ကာ အေျခခံအားျဖင့္ (၃) မ်ိဳးေတြ႕ႏိုင္ပါသည္။ ၎တို႔မွာ _

1)    Noun phrase
2)    Adjective phrase
3)    Adverb phrase 

(ဆိုလိုသည္မွ Noun ေနရာတြင္ရွိေသာ phrase ကို Noun phrase ဟုေခၚႏိုင္ၿပီး ထို႔အတူ Adj, Adv ေနရာမ်ားတြင္ရွိေသာ phrase မ်ားကို Adj phrase, Adv phrase ဟုေခၚႏိုင္ပါသည္။)

Noun phrase [ S, O, C ]

Noun ေနရာတြင္ တည္ရွိေနေသာ phrase မ်ားကို Noun phrase ဟု သတ္မွတ္ႏိုင္ ေသာေၾကာင့္ ဝါက်တစ္ေၾကာင္း ေပၚတြင္ Noun တည္ရွိေနေသာ ေနရာမ်ားကို ဦးစြာသိရွိ ရမည္ ျဖစ္ပါသည္။ ဝါက်တစ္ေၾကာင္းတြင္ “ကတၱား (Subject)”၊ “ကံပုဒ္ (Object)” ႏွင့္ “အျဖည့္ပုဒ္ (Complement)” ၃ ေနရာတြင္ Noun ကိုေတြ႕ရွိႏိုင္ၿပီး ၎ေနရာမ်ားတြင္ တည္ရွိေနေသာ phrase မ်ားကို Noun phrase မ်ားျဖစ္ပါသည္။ ျမန္မာဘာသာသို႔ အဓိပၸာယ္ ျပန္ဆိုရာတြင္ Subject ေနရာတြင္ရွိေသာ Noun phrase အတြက္ “သည္”၊ Object ေနရာတြင္ရွိေသာ Noun phrase အတြက္ “ကို”၊ Complement ေနရာတြင္ရွိေသာ Noun phrase အတြက္ “သည္” စသည္ျဖင့္ အနက္ေကာက္ ရပါမည္။

A tall young beautiful girl is my sister.
  S ( N phrase)
အရပ္ရွည္၍ ငယ္ရြယ္ၿပီး ေခ်ာေမာ လွပေသာ မိန္းကေလးသည္ ကၽြန္ေတာ့္ အစ္မ ျဖစ္သည္။

I saw a tall young beautiful girl.
                  O (N phrase)
အရပ္ရွည္၍ ငယ္ရြယ္ၿပီး ေခ်ာေမာ လွပေသာ မိန္းကေလးကို ကၽြန္ေတာ္ ေတြ႕ခဲ့ပါသည္။


Ma Ma is a tall young beautiful girl.
                        C (N phrase)
မမသည္ အရပ္ရွည္၍ ငယ္ရြယ္ၿပီး ေခ်ာေမာ လွပေသာ မိန္းကေလးတစ္ေယာက္ ျဖစ္သည္။

v  what, where, when, why, whether, who စသည့္ “wh” စကားလံုးမ်ား ျဖင့္လည္း Noun phrase ကို ေရးသားႏိုင္သည္။

ဥပမာ _

I don’t know what to do.
ဘာလုပ္ရမွန္းကို ကၽြန္ေတာ္မသိဘူး။

How to do is my problem.
ဘယ္လုပ္လုရမယ္ဆိုတာသည္ ကၽြန္ေတာ့္ျပႆနာ ျဖစ္သည္။

She can’t decide where to go.
ဘယ္သြားရမလဲဆိုတာကို သူ မဆံုးျဖတ္တတ္ေတာ့ပါ။


Adjective phrase [after Noun, Complement]

            Noun ၏အေနာက္ ႏွင့္ Complement ေနရာတြင္ Adjective phrase ကိုေတြႏိုင္သည္။ Noun ၏အေနာက္တြင္ ရွိေသာ Adjective phrase သည္ သူ႔ေရွ႕မွာရွိေသာ Noun ကို အထူးျပဳရန္ျဖစ္ၿပီး Complement ေနရာတြင္ရွိေသာ Adjective phrase ၏ေရွ႕တြင္ အထူးျပဳရန္အတြက္ Noun မရွိေသာ္လည္း အသံ ပိုမို သာယာေစရန္ႏွင့္ အဓိပၸာယ္ ပိုမို ေလးနက္ေစရန္အတြက္ Adjective အျဖစ္ရွိေနေသာ မူလ စကားလံုးကို Adjective phrase အျဖစ္ေျပာင္းေရးရျခင္း ျဖစ္ပါသည္။ ဥပမာ _

A man in the car is my uncle.
ကားထဲတြင္ရွိေသာ လူႀကီးသည္ ကၽြန္ေတာ့္ ဦးေလး ျဖစ္သည္။

I took a book on the table.
စားပြဲေပၚတြင္ရွိေသာ စာအုပ္ကို ကၽြန္ေတာ္ ယူခဲ့သည္။

Ø  ပထမ ဝါက်တြင္ Subject ေနရာတြင္ရွိေသာ Noun ျဖစ္သည့္ a man ကို ၎ေနာက္တြင္ရွိသည့္ in the car ဟူသည့္ phrase က အထူးျပဳသည့္အတြက္ Adjective phrase ျဖစ္သည္။ ဒုတိယဝါက်တြင္လည္း ထို႔အတူပင္ ျဖစ္ပါသည္။

My mother is healthy.
                      Adj
My mother is in good health.
                      Adj phrase

Ø  healthy ႏွင့္ in good health တြင္ in good health က healthy ထက္ ပိုမို အသံသာယာ ေသာေၾကာင့္ Adjective phrase အျဖစ္ ေျပာင္းလဲေရးသားျခင္း ျဖစ္သည္။

It is important.
            Adj
It is of vital importance.
        Adjective phrase

It is important ဆိုသည္မွာ သာမန္အေရးႀကီးျခင္းပင္ျဖစ္သည္။ ပို၍ အဓိပၸာယ္ ေလးနက္ေစလို ေသာေၾကာင့္ အသက္တမွ်ဟူသည့္ Adj ေနာက္တစ္ခု vital ကို ထည့္ေပးျခင္း ျဖစ္သည္။ သို႔ရာတြင္ vital ႏွင့္ important ႏွစ္ခုလံုး Adj ျဖစ္ေနသည့္ အတြက္ important ကို noun (importance) အျဖစ္ေျပာင္းၿပီး ေရွ႕တြင္ of ထည့္ေပးရသည္။ of vital importance သည္ အဓိပၸာယ္ ပိုမို ေလးနက္ေစလိုေသာ ေၾကာင့္ ေျပာင္းလဲ ေရးလိုက္ေသာ Adjective phrase ျဖစ္သည္။

Adverb phrase [ D, M, P, T, R or P ]

            Noun phrase ႏွင့္ Adjective phrase တို႔ကို ေနရာ သတ္မွတ္၍ ရေသာ္လည္း Adverb သည္ Verb, Adjective, Adverb သံုးခုကို အထူးျပဳေသာေၾကာင့္ ေနရာ အတိအက် သတ္မွတ္ရန္ မလြယ္ကူပါ။ သို႔ရာတြင္ Adverb ကို အေျခခံအားျဖင့္ အမ်ိဳးစား ၅ မ်ိဳးေတြ႕ႏိုင္ပါသည္။ ၎တို႔မွာ _

Direction                       - လားရာ/ ဦးတည္ရာျပပုဒ္စု         (D)
Manner                         - အမူအယာျပ ပုဒ္စု                    (M)
Place                             - ေနရာျပ ပုဒ္စု                          (P)
Time                             - အခ်ိန္ျပ ပုဒ္စု                          (T)
Reason (or)                   - အေၾကာင္းျပခ်က္ (သို႔မဟုတ္)   
Purpose                           ရည္ရြယ္ခ်က္ျပ ပုဒ္စု                 (R or P)
                                                                               
ဥပမာ -

-       He went up to the counter. (D)

-       They play in happiness. (M)

-       It is warm in the house. (P)

-       He gets up at six o’ clock. (T)

-       He lives to work. ( R or P)


He goes to school on foot in Insein in the morning to study his lessons.
               D            M          P             T                    R or P
သူ၏ သင္ခန္းစာမ်ားကို ေလ့လာရန္ နံနက္ခင္းတြင္ အင္းစိန္မွ ေျခက်င္ ေက်ာင္းသို႔သြားသည္။


      အဓိပၸာယ္ကို ဘာသာျပန္သည့္အခါ D, M, P, T, R or P ကို အစဥ္လိုက္ ေနာက္ဆံုးမွ စတင္ကာ အနက္ေကာင္သည္ကို မွတ္သားရပါမည္။


[ Adverb phrase မ်ားကို ေဖာ္ျပလိုသည့္ ပံုစံအေပၚ မူတည္ကာ အေရွ႕၊ အေနာက္ ေျပာင္းလည္း ေရးသားႏိုင္ေသာ္လည္း မကၽြမ္းက်င္ေသးသည့္ အခ်ိန္တြင္ D, M, P, T, R or P အစီအစဥ္အတိုင္းသာ ေရးသားေစလိုပါသည္။ ကၽြမ္းက်င္ တတ္ေျမာက္သည့္ အခ်ိန္တြင္ မိမိ ေဖာ္ျပသလို ေနရာမ်ား ေျပာင္းလဲ ေရးသားႏိုင္ပါသည္။]


     Adjective phrase ႏွင့္ Adverb phrase ေရာေႏွာေနပါလွ်င္လည္း ေနာက္ဆံုးကသာ စတင္ကာ ဘာသာျပန္ရပါမည္။


ဥပမာ _  He goes to school in Sanchaung.
                           Adv (D)    Adj phrase        

ေဖာ္ျပပါ ဝါက်တြင္ in Sanchaung သည္ ေရွ႕တြင္ရွိေသာ school (n) ကို အထူးျပဳ ေသာေၾကာင့္ Adjective phrase ျဖစ္ၿပီး စမ္းေခ်ာင္းတြင္ရွိေသာ ေက်ာင္းသို႔ ဟု (ေသာ)ျဖင့္ အနက္ေကာက္ ရပါမည္။

ေဖာ္ျပပါ link တြင္ ဆရာႀကီး ဦးျမႀကိဳင္ ကိုယ္တိုင္ သင္ၾကားပို႔ခ်မႈကို ၾကည့္႐ႈကာ ေလ့လာ ဆည္းပူးႏိုင္ပါသည္။
https://www.youtube.com/watch?v=_z-IoBp7Ux4


Credit to :  ေအာင္ကိုဦး (UMK)

Advertise Here !

Software Full Version Download and Tech News Update

Windows မွာ နာရီပါေပမယ့္ Alarm စနစ္ အဆင္မေျပပါဘူး.. အလုပ္လုပ္ရင္းနဲ႔ အလုပ္မွာ စီးေမ်ာရင္ တစ္ျခားအလုပ္ရွိတာ သတိမထားတတ္ၾကပါဘူး.. ကၽြန္ေတာ္ကိုယ္တိုင္လည္း ဒီလိုခဏခဏျဖစ္တတ္ပါတယ္.. Atomic Alarm Clock 6.01 ကေတာ့ Windows ရဲ႕ Default Clock ကို အစားထိုးၿပီး Alarm စနစ္ေတြကို Label ေတြနဲ႔ထားႏိုင္ပါတယ္.. Tray မွာပဲထားထား Desktop မွာပဲထားထား အဆင္ေျပပါတယ္... မိတ္ေဆြမ်ား အလုပ္လုပ္ဖို႔ ေနာက္က်တာ၊ ခ်ိန္းဆိုထားေတြ ေနာက္က်တာေတြ မျဖစ္ေတာ့ဘူးေပါ့...


features of "Atomic Alarm Clock":

· Software fully automated PC usage tracking / project that monitors the time spent on the PC. WorkTime gathers statistics about projects in which you work.
· Time Tracking is the recording process at the time you or your employees trabajeis on various projects or tasks for your customers, your business or yourself.
· Project Clock is a employee time recording system employee. If your company must keep track of the time of entry of several workers in one or more workstations, this time clock software is just for you.
· Clock Tray Topics - Substitute clock advanced desktop Windows tray. See the time, day and date in different aspects. More than 60 items are included in the distribution.
· Displays the current time and date in another time zone, next to the clock on your computer desktop.
· Tell time, improves desktop clock taskbar

အဆင္ေျပပါေစ...

ေမာင္ေပါက္

Download Links:


Advertise Here !

Software Full Version Download and Tech News Update

Windows 8 အသံုးျပဳေနတဲ့ မိတ္ေဆြမ်ားအတြက္ Windows 8 System Speed Booster 3.0.1.2 တင္ေပးလိုက္ပါတယ္.. Free Version ျဖစ္ၿပီး Windows 8 System တစ္ခုလံုးမွာ မလိုအပ္ဘဲ Run ေနတာေတြ၊ မလိုအပ္တဲ့ဖိုင္ေတြ၊ Registry အမွားေတြကို ရွင္းလင္းဖယ္ထုတ္ေပးတယ္လို႔ ဆိုပါတယ္... ကၽြန္ေတာ္က Windows 8 ကို မသံုးေပမယ့္ သံုးတဲ့သူေတြ စမ္းသပ္အသံုးျပဳဖို႔ တင္ေပးလိုက္ပါတယ္..
By scanning and removing all the obsolete registry entries, System Speed Booster will make your Windows registry compact and clean to speed up the running of your PC.
Problems will be found in your system, with the help of System Speed Booster you can fix all the errors for an optimization of system.
From installing to running the app, the processes are smooth and fast. Just a few minutes, you will enjoy the best PC experience ever.
There is no doubt about it. The award-winning software is 100% free and no adware, no spyware, no virus at all.
Besides the Registry Fix functions, other built-in tools include Privacy Sweep, Junk Files Removal, System Optimization, etc. All these tasks can be settled in one go.

အဆင္ေျပပါေစ..

ေမာင္ေပါက္


Download Links: 8.3 MB

Advertise Here !

Software Full Version Download and Tech News Update

Myo Lwin : အကိုတို႔ေရ ကြ်န္ေတာ္႔စက္က  w-7 ပါ ကြ်န္ေတာ္ဘာမွားႏွိပ္မိလဲ မသိပါဘူး right click ေခါက္ၿပီး
new ကိုႏွိပ္လိုက္တယ္ new folder မေပၚလာဘူးျဖစ္ေနတယ္ အဲ႔ဒါဘယ္လိုျပန္လုပ္ရမလဲဆိုတာ
ေျပာျပေပးပါေနာ္ က်န္တာေတာ႔အားလံုးေကာင္းပါတယ္ ဓာတ္ပံုရိုက္ၿပီး ထည္႔ေပးလိုက္တယ္
အစဥ္အားေပးလွ်က္

ကို Myo Lwin ရဲ႕ေမးခြန္းအတြက္ အျခားသူေတြ ဘယ္လိုလုပ္ေနသလဲ မသိေပမယ့္ ကၽြန္ေတာ္သိတဲ့နည္းေလး ေျပာျပခ်င္ပါတယ္...
နည္းက (၂)နည္းျဖစ္ပါတယ္..

ပထမနည္း - Software သံုးၿပီးေျဖရွင္းျခင္း
1. ေအာက္ကလင့္မွာ Registry Clean Pro ကိုေဒါင္းၿပီး Full Version ျဖစ္ေအာင္လုပ္လိုက္ပါ.. (သတိ- ကီးထည့္ရင္ အင္တာနက္ပိတ္ထားပါ ) ၿပီးရင္ Run ၿပီး Clean လုပ္လိုက္ပါ...
2. ကြန္ပ်ဴတာမွာ Program ေတြဖြင့္ထားရင္ အားလံုးပိတ္လိုက္ပါ.. ၿပီးရင္ Antivirus ကိုပါပိတ္လိုက္ပါ..
ေအာက္မွာေပးထားတဲ့လင့္တစ္ခုခုက ဖိုင္ကို ေဒါင္းၿပီးျဖည္လိုက္ပါ.. အထဲမွာပါတဲ့ Add_Missing_New_Context_Menu_Item.reg ကို Right Click ေထာက္ၿပီး Run As Administrator ကိုႏွိပ္ေပးလိုက္ပါ.. ၿပီးရင္ ကြန္ပ်ဴတာကို Restart ခ်ေပးလိုက္ပါ.. ဒါဆိုရင္ အဆင္ေျပပါမယ္....
Dev-Host   Zippyshare   Solidfiles

ဒုတိယနည္း Registry မွာ ျပင္ဆင္ျခင္း
ဒီနည္းက Registry ကို နားမလည္သူေတြအဖို႔ မလုပ္သင့္ပါဘူး.. Windows System ဖိုင္ေတြအားလံုးရဲ႕ အသက္ဟာ Registry ဆိုႏိုင္ပါတယ္.. တကယ္လို႔ မိတ္ေဆြဟာ Windows Registry ကို နားလည္တယ္ဆိုရင္ေတာ့ ေအာက္ပါနည္းလမ္းအတိုင္းလုပ္လိုက္ပါ...
1. Start>regedit လို႔ရိုက္ထည့္ၿပီး Enter ေခါက္လုိက္ပါ...
2. က်လာတဲ့ Registry Editor မွာ HKEY_CLASSES_ROOT\Directory\Background\shellex\ContextMenuHandlers\ တိုင္းေရာက္ေအာင္သြားပါ..
3. HKEY_CLASSES_ROOT\Directory\Background\shellex\ContextMenuHandlers\ ရဲ႕ေအာက္မွာ New Key တစ္ခုကို Create လုပ္ပါ.. New Key ရဲ႕ Default Value ကို {D969A300-E7FF-11d0-A93B-00A0C90F2719} လို႔ေပးပါ.. ဒါဆိုရင္ အဆင္ေျပပါၿပီ...

အဆင္မေျပပါက ျပန္ေျပာေပးပါ.. ကၽြမ္းက်င္တဲ့ ပညာရွင္မ်ားကလည္း ကၽြန္ေတာ္ေျပာျပတဲ့နည္းနဲ႔ ဒီထက္ေကာင္းတဲ့နည္းရွိရင္ ပါ၀င္ေဆြးေႏြးၾကဖို႔ ေလးစားစြာ ဖိတ္ေခၚအပ္ပါတယ္ခင္ဗ်ာ..

အဆင္ေျပပါေစ..

ေမာင္ေပါက္


Advertise Here !

Software Full Version Download and Tech News Update

Aung Latt : ကူညီပါဦး..Bro.ကြၽန္‌‌ေတာ့္‌ Computerက Window8 64bits ပါ
Computerမွာ Ebooks ‌ေတြကိုၾကည္‌့ရင္‌ စာအုပ္‌ရဲ႕ Cover ပုံ‌ေတြကို အခုလိုမျမင္‌ရပါ
အဲဒါျမင္‌ရ‌ေအာင္‌ ဘယ္‌လိုလုပ္‌ရမလဲ Adobe Reader သြင္‌းရမွာလား
Computer ဝယ္‌ကထည္‌းက ပါလာၿပီးသား Adobe Reader လည္‌း႐ွိရက္‌နဲ႔ဘာလို႔မျမင္‌ရတာလဲ ကူညီပါဦး Bro ခုလိုျမင္‌ရ‌ေတာ့ ဘာစာအုပ္‌ဆိုတာ တန္‌းသိရတယ္‌‌ေလ Pls

ကိုေအာင္လတ္လိုပဲ ကိုသန္းမင္းေအာင္ကလည္း Windows 7 မွာ အဲလိုေပၚခ်င္လို႔ဆိုပဲ..

Windows 7 မွာ လုပ္နည္း အရင္ၾကည့္ရေအာင္...
1. My Computer ကိုဖြင့္လိုက္ပါ..
2. ေဘးက Organize ကိုတစ္ခ်က္ႏွိပ္လိုက္ၿပီး က်လာတဲ့ Dropdown List မွာ Folders and search Option ကိုႏွိပ္လိုက္ပါ..


3. က်လာတဲ့ Folder Option မွာ အေပၚတန္းက View Tab ကိုတစ္ခ်က္ႏွိပ္ၿပီး Files and Folder ေခါင္းစဥ္ေအာက္က Always show icons, never thumbnails စာသားရဲ႕ေဘးကအကြက္ကေလးထဲမွာ အမွန္ျခစ္ကို ျဖဳတ္ပစ္ၿပီး Display File icon on thumbnails ရဲ႕ ေဘးက အကြက္ေလးထဲမွာ အမွန္ျခစ္ေလး တပ္ေပးလိုက္ပါ.. ၿပီးရင္ေတာ့ Apply ကိုႏွိပ္, OK ကိုႏွိပ္.. ဒါဆိုရပါၿပီ...

4. အဲဒါမွ မရေသးရင္ PDF Viewer ျဖစ္တဲ့ Adobe Acrobat Reader, Foxit Reader တို႔ကို Uninstall လုပ္ၿပီး ျပန္ Install လုပ္လိုက္ပါ... ၿပီးရင္ အေပၚက အတိုင္း ျဖစ္ေအာင္ျပန္လုပ္လိုက္ပါ... ဒါဆို ဒီလိုေလးေပၚၿပီ... အိုေခ...


Windows 8 (64bit ) မွာလုပ္နည္း
အမွန္အတိုင္းေျပာရရင္ ကၽြန္ေတာ္ Windows 8 ကို သံုးကို မသံုးပါ.. ဒါေပမယ့္ ေလ့လာၾကည့္ေတာ့ Software ေလးတစ္ခု Run လိုက္တာနဲ႔ အဆင္ေျပတယ္လို႔ေရးထားတာေတြ႕တယ္.. Microsoft က တရား၀င္ေရးထားတာပါ.. ေအာက္ကလင့္မွာ ေဒါင္းပါခင္ဗ်ာ..


Download the fixes:
အဆင္ေျပၾကပါေစဗ်ာ...

ေမာင္ေပါက္

Advertise Here !